Using Excel Forms for data entry and management
Excel Form is a built-in tool that allows us to enter, edit, and search records in a structured table without manually navigating cells. It's especially useful for managing databases like employee lists, inventories, or customer records.
Prepare Your Data Table
Before using the form, you need a well-structured table.
- Headers Required: Make sure your first row contains column headers (e.g., First Name, Last Name, Department, Location).
- Select Your Range: Highlight the range of cells that includes your headers and data (e.g., A1:D15).
- Format as Table:
- Go to the Home tab.
- Click Format as Table.
- Confirm the range and check "My table has headers".

Enable the Form Button:
The Form button isn’t visible by default, so you’ll need to add it to the Quick Access Toolbar.
Option A: Use the Dropdown Menu
- Click the Customize Quick Access Toolbar dropdown (top-left corner).
- Select More Commands...
- In the choose commands from: dropdown, select All Commands.
- Scroll through the list until you find Form.
- Click Add >> to move it to the right-hand list (your active toolbar).
- Click OK to save changes.


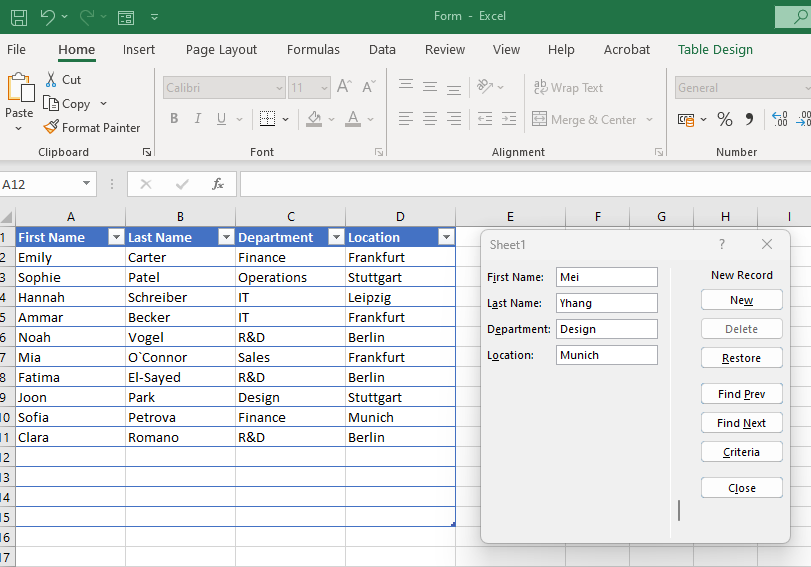
Using the Form
Once added, click the Form button to open the data entry form. The Form window opens with fields matching the table headers.
Tips for efficient use
- Use Tab to quickly move between fields.
- Use Criteria to filter records using specific field values (like by department or location)
- Keep the table clean, avoid merged cells or blank headers.