How to Use Live Captions and Transcriptions in Microsoft Teams
Microsoft Teams: Bridging Language Barriers
Live Translated Captions break down language barriers in real-time during meetings, translating spoken words into the user's chosen language. Meanwhile, Live Transcription captures every spoken word, providing a written record in near real-time.
Enabling Live Captions

Start or join a meeting in Microsoft Teams, then click the ‘Join’ button for a scheduled meeting or start a new one.
Turning on Live Captions
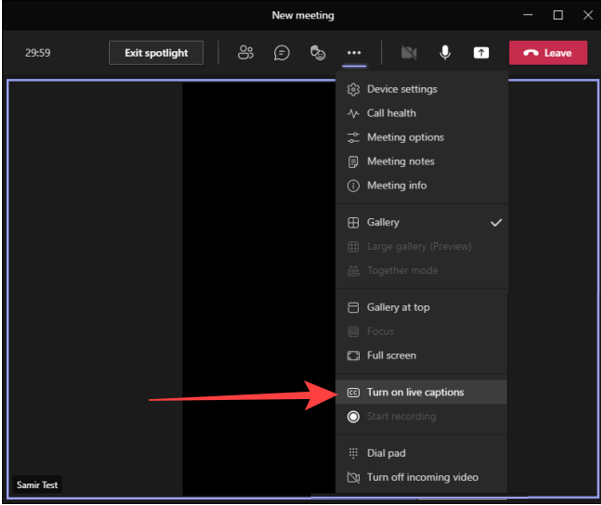
In the More menu, select 'Turn on live captions'. The captions will appear at the bottom of the screen, visible only to you.
Customizing Live Captions
On Windows or Mac, you can customize the font size, color, and positioning of the captions within the meeting window.
Starting Live Transcription

Go to the meeting controls, select 'More actions', then choose 'Record and transcribe' followed by 'Start transcription'.
Changing Transcript Language

Select 'Transcript settings', hover over "Spoken language," and pick a preferred language.
Live Translated Transcription

Toggle on "Show both original and translation" to view both the original and translated transcript side-by-side.
Stopping and Restarting Transcription
- Select 'More actions' in meeting controls.
- Choose 'Record and transcribe' and select 'Stop transcription'.
Summary
Microsoft Teams' Live Captions and Transcription features enhance communication by addressing language barriers and aiding individuals with hearing impairments. Whether for global meetings or local webinars, these tools ensure that every voice is heard.