VM Scaling with Load Balancers in Azure
Azure Virtual Machine Scale Sets (VMSS) offer a powerful solution for managing and scaling groups of identical, load-balanced VMs. While VMSS typically allows for automatic scaling based on demand or predefined schedules, in this guide, we'll focus on a specific example using a fixed number of VMs with a load balancer.
We'll walk through the process of setting up three virtual machines with an Azure Load Balancer, creating a robust infrastructure for high availability and application resiliency. This setup demonstrates the principles of load balancing and can serve as a foundation for more complex, automatically scaling environments in the future.
In this guide, we'll cover everything from creating a virtual network to configuring the load balancer and installing necessary software on the VMs. While we're using a fixed number of VMs in this example, the concepts we'll explore are applicable to both static and dynamically scaling environments.
By following these steps, you'll create a load-balanced environment that distributes traffic across multiple VMs, ensuring better performance and reliability for your applications. Let's begin with the first step: creating a virtual network for our infrastructure.
Step 1: Create a Virtual Network
In the Azure Portal, search for Virtual Networks and click Create.

- Name: WebAppNet (or any desired)
- Address Space: 10.0.0.0/16
- Subnet:
- Name: WebAppSubnet
- Address Range: 10.0.0.0/24
Complete the setup and create the virtual network.

Step 2: Configure Network Security Group (NSG)
In the Azure Portal, create a Network Security Group (NSG) and configure the following:
- Name: WebAppNSG
- Resource Group: Same as the virtual network.

Add inbound Rules:
- RDP: Port 3389, Protocol TCP, Source My IP.

- HTTPS: Port 443, Protocol TCP, Source Any.

Step 3: Associate the NSG with the Subnet
Next step is to associate your Network Security Group (NSG) with the WebAppSubnet previously created.
- Log in to the Azure Portal.
- In the search bar at the top, type Virtual Networks and click on it.
- Select your virtual network (WebAppNet) from the list.
- Go to the Subnets tab in the virtual network settings.
- Locate the subnet you created (WebAppSubnet).
- Click on the WebAppSubnet to edit its settings.
- Under the Network security group dropdown, select the NSG you created earlier (WebAppNSG).
- Click Save to apply the changes.

Step 4: Create Virtual Machines
For this scenario we shall create three VMs:
- Name: VM1, VM2, VM3
- Size: Choose a suitable size (e.g., Standard_D2s_v3).
- Select inbound ports: RDP (3389)
- Network: Associate with WebAppNet and WebAppSubnet
- Public IP: Create a new public IP for each VM.

Step 5: Create and Configure a Load Balancer
In the Azure Portal, search for Load Balancers and click Create.
- Name: WebAppLB
- Type: Public
- SKU: Standard

Frontend IP Configuration: Create a new public IP (WebAppLBIP)

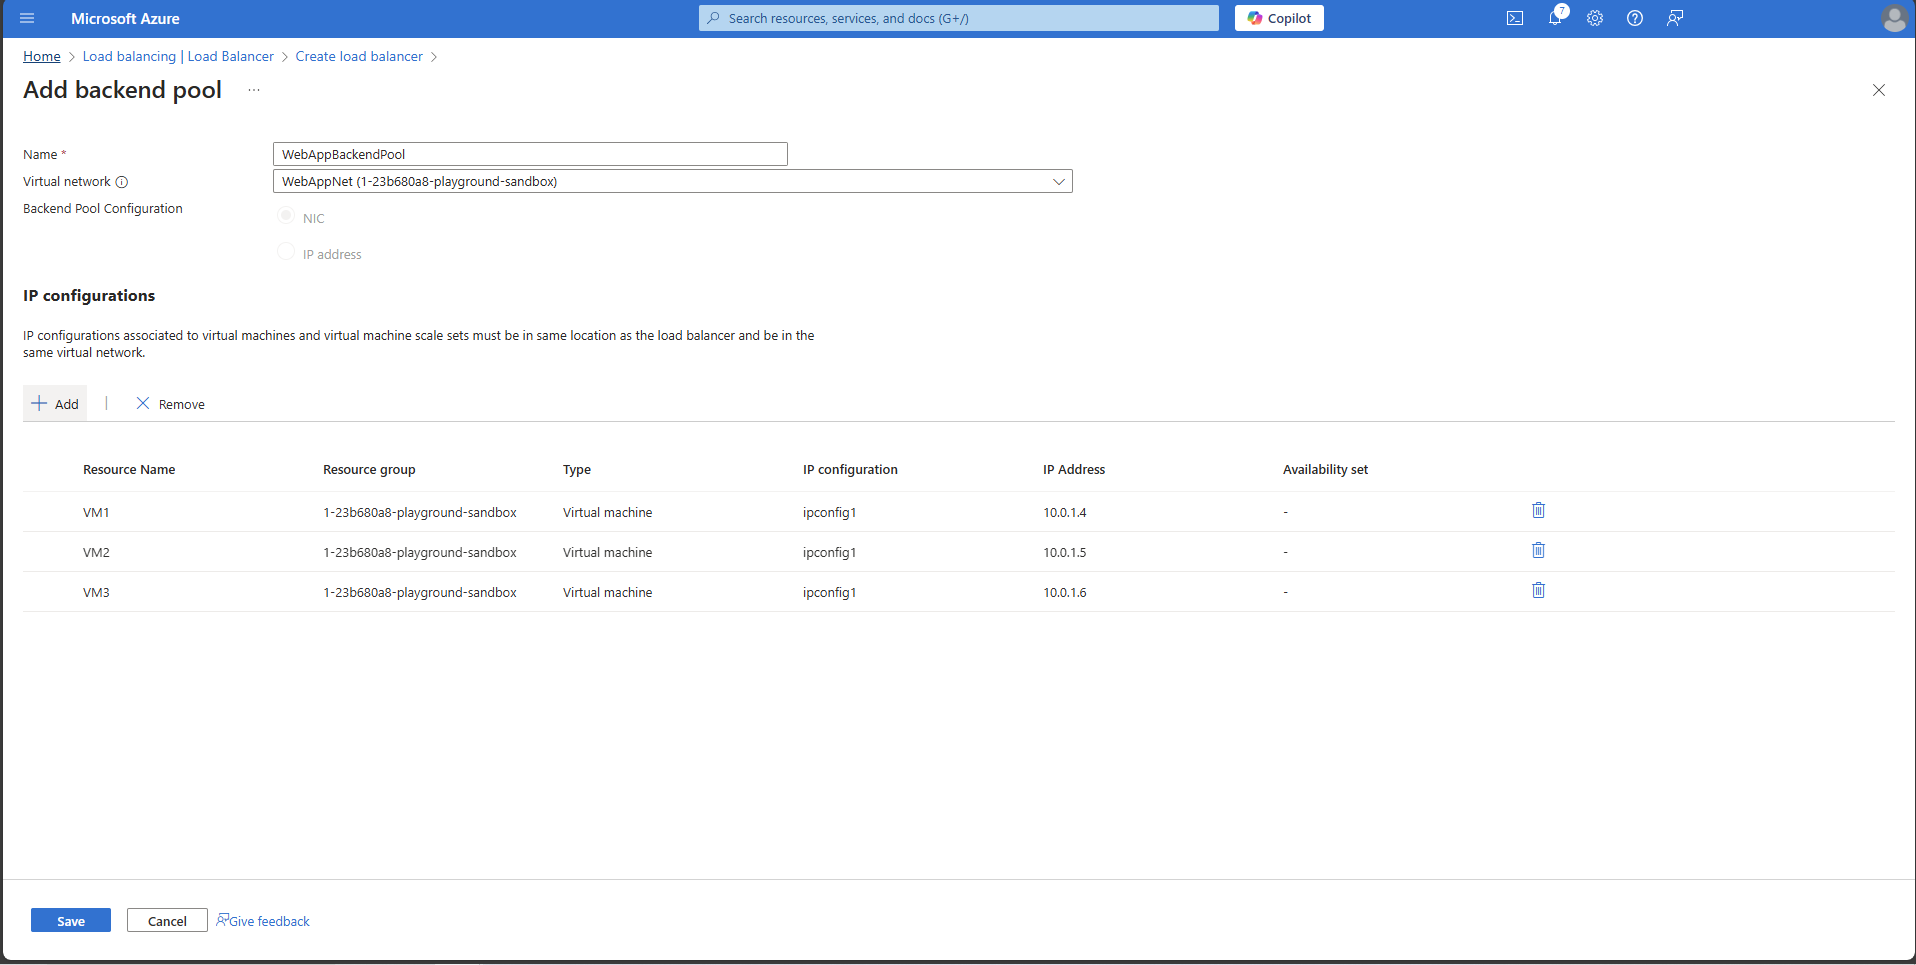
In the load balancer, go to Backend Pools and click + Add.
- Name: WebAppBackendPool
- Configuration: Use NIC
- Add all three VMs (VM1, VM2, VM3) to the backend pool and save it.
Click on Review + Create. Upon creating Load Balancer, Health Probe is the next one to configure.
Configure Health Probes:
Navigate to Health Probes and click + Add.

- Name: HTTPSProbe
- Protocol: HTTPS
- Port: 443
- Path: /

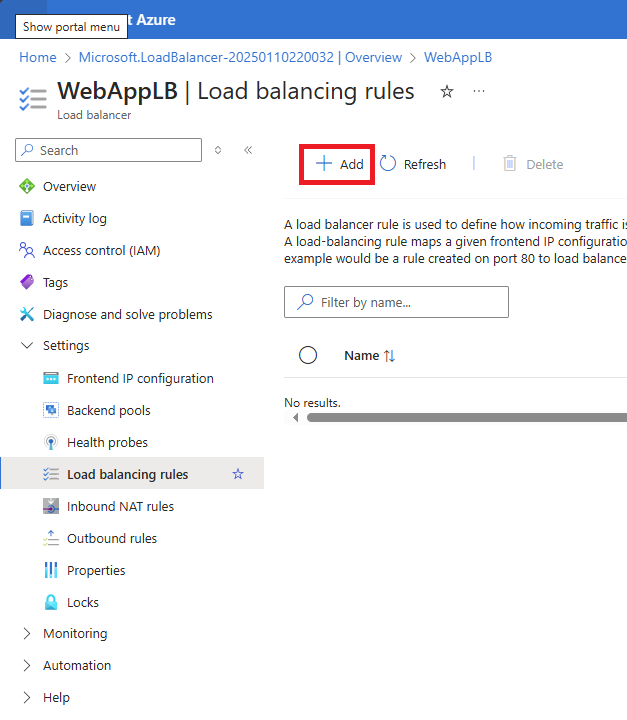
Create Load Balancing Rules:
Go to Load Balancing Rules and click + Add.
- Name: TCP
- Frontend IP Configuration: Select the one previously created (WebAppLBIP)
- Backend Pool: Select the one previously created (WebAppBackendPool)
- Protocol: TCP
- Port: 443
- Backend Port: 443
- Session Persistence: None
- Enable TCP Reset: Select

Click on Save
Step 6: Install and Configure IIS
Install IIS via Control Panel or PowerShell:

or via the command line
dism /online /enable-feature /featurename:IIS-WebServer /all /norestart
Create a custom index.html file on each VM:
Import the SSL certificate and configure IIS to use HTTPS.
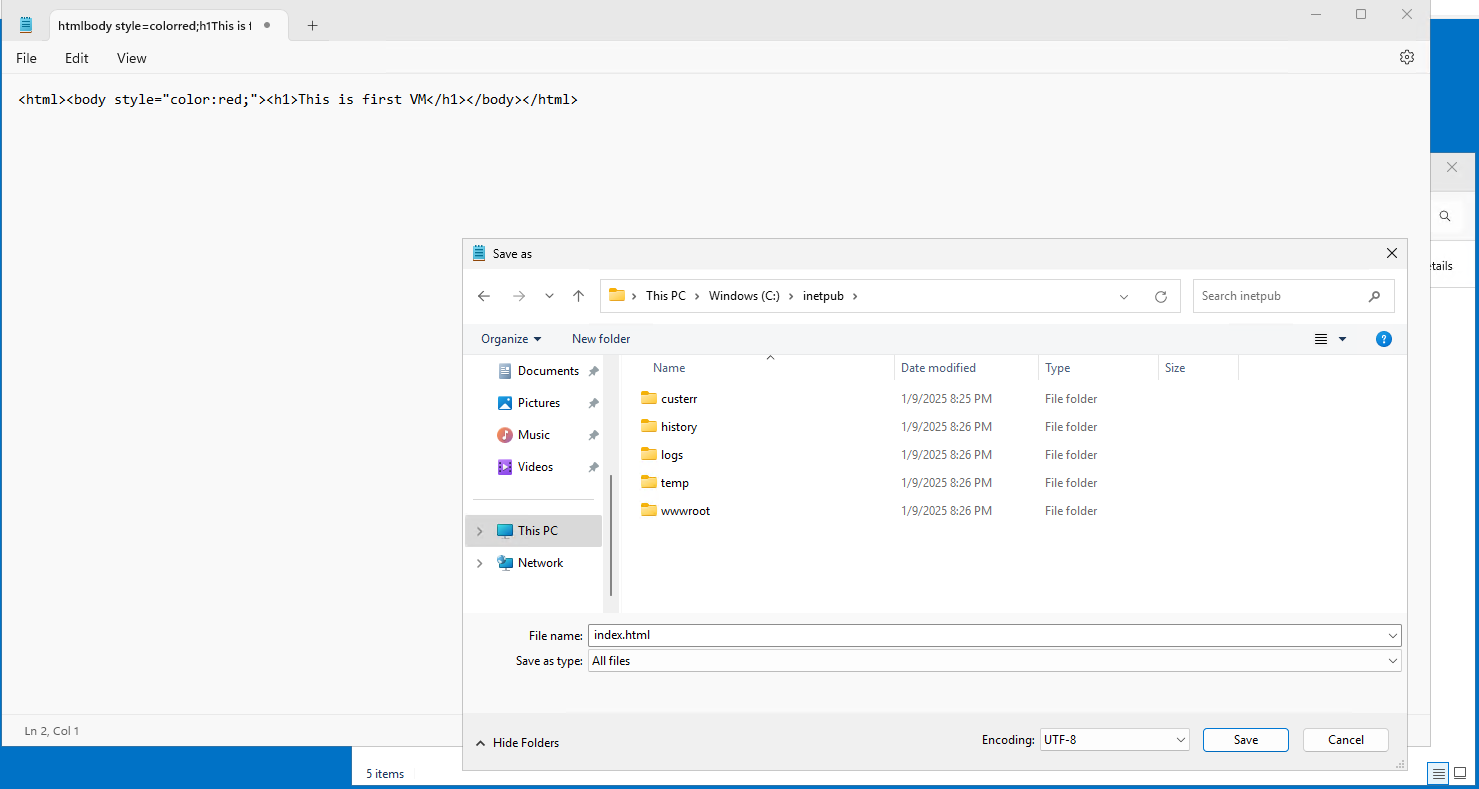
Step 7: Create a custom index.html file on each VM
Open Notepad and copy into body:
<html><body style="color:red;"><h1>This is first VM</h1></body></html>and save the file to C:\inetpub\wwwroot\ as index.html
Importing SSL certificate and configuring IIS
- Upon receiving your certificate save the SSL certificate file you received onto each VM.
- On each VM, open the Certificate Manager by typing certmgr.msc in the Run dialog.
- In the Certificate Manager, expand Personal, right-click on Certificates and select All Tasks > Import.
- Follow the Certificate Import Wizard to import your SSL certificate file and ensure it is placed in the “Personal”.

Configuring IIS to Use the SSL Certificate
The last step before the testing of the site is to configure Internet Information Services (IIS) Manager to use the SSL certificate.
- On each VM, open Internet Information Services (IIS) Manager.
- Select the website we created in order to configure it from the Connections pane. Right click on “Sites” and “Add Website”.
- Upon adding a website, click on it and under the “Actions” pane click on “Bindings”.
- In the Add Site Bindingwindow:
- Set Type to https.
- Under the IP Address select the IP address that corresponds to the frontend IP of the load balancer.
- Select the imported SSL certificate from the SSL certificate dropdown.
- Click OK and close the Site Bindings window.
- Restart the IIS services to apply the changes on each VM.
The final step is to test your site and load balancer. To do this, enter the Load Balancer's IP address into your browser. Then, refresh the site multiple times to make repeated requests. As you do this, you should notice different text and colors appearing, indicating that the load balancer is distributing traffic across all Virtual Machines (VMs). By following these steps, you can confirm that your website is accessible on the internet and that the load balancer is functioning effectively.